
How do I Replace a Head Gasket on My '94 Ford Ranger 2.3L?
You will want to disconect the battery, drain all the coolant and remove the oil pan drain plug. Removing the drain plug is to allow any coolant that gets into the engine to drain out quickly and keeps from causing any damage to the engine. Follow the steps listed below. I suggest using a paint marker to mark all wires and hoses. When done top off all fluids and double check all bolts and fittings. Reconnect the battery and start the engine. Re-check coolant level after engine has had a chance to warm.
If you need Full Step by Step Instructions Online right Now obtain the information from Auto Repair Manuals.
Head Gasket
REMOVAL & INSTALLATION
NOTE: Before installing the cylinder heads, have them cleaned and professionally checked. If there is a problem, generally, it will not go away by simply installing new gaskets. Cylinder heads can and do warp, which is the major cause of gasket failure. This is usually due to overheating.
2.3L and 2.5L Engine
- Disconnect the negative battery cable.
- Drain cooling system.
CAUTION
When draining the coolant, keep in mind that cats and dogs are attracted by ethylene glycol antifreeze, and are quite likely to drink any that is left in an uncovered container or in puddles on the ground. This will prove fatal in sufficient quantity. Always drain the coolant into a sealable container. Coolant should be reused unless it is contaminated or several years old. - Remove air cleaner assembly.
- Remove the heater hose-to-valve cover retaining screws.
- Remove the spark plugs.
- Label and disconnect all of the upper engine components and alternator wiring harnesses.
- Label and remove the spark plug wires.
- Disconnect the Exhaust Gas Oxygen (EGO) sensor at the exhaust manifold.
- Disconnect required vacuum hoses.
- Remove dipstick tube and bracket.
- Remove rocker retaining bolts and remove cover.
- Remove intake manifold retaining bolts.
- Loosen alternator retaining bolts and remove belt from the pulley. Remove mounting bracket retaining bolts to the head.
- Disconnect the upper radiator hose at both ends and remove from the vehicle.
- Remove the timing belt cover bolts and remove the cover. For power steering-equipped vehicles, unbolt the power steering pump bracket and position it off to the side.
- Loosen the timing belt idler retaining bolts. Position idler in the unloaded position and tighten the retaining bolts.
- Remove the timing belt from the cam pulley and auxiliary pulley.
- Remove four nuts and/or stud bolts retaining heat stove to exhaust manifold.
- Remove the eight exhaust manifold retaining bolts.
- Remove the timing belt idler and two bracket bolts.
- Remove the timing belt idler spring stop from the cylinder head.
- Disconnect the oil sending unit lead wire.
- Remove the cylinder head retaining bolts.
- Remove the cylinder head.
- Clean the cylinder head, intake manifold and exhaust manifold gasket surfaces.
- Blow oil out of the cylinder head bolt block hoses.
- Clean valve cover gasket surface on the head.
- Check cylinder head for flatness.
To install:
- Position head gasket on the block.
- Clean rocker arm cover (cam cover).
- Install valve cover gasket to the valve cover.
- Position cylinder head to block.
- Install cylinder head retaining bolts and tighten to specifications.
Fig. 1: 2.3L and 2.5L cylinder head bolt tightening sequence 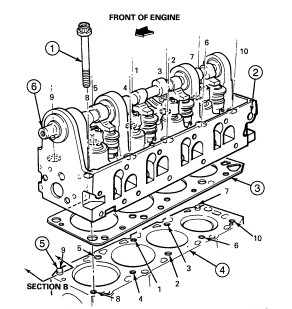
- Connect oil sending unit lead wires.
- Install the timing belt idler spring stop to the cylinder head.
- Position the timing belt idler to the cylinder head, and install its retaining bolts.
- Install the eight exhaust manifold retaining bolts and/or stud bolts.
- Install four nuts and/or stud bolts retaining heat stove to exhaust manifold.
- Align the cam gear with pointer.
- Align the crank pulley (TDC) with the pointer on the timing belt cover.
- Position the timing belt to the pulleys (cam and auxiliary).
- Loosen idler retaining bolts to tension the belt, then rotate the engine and check timing alignment.
- Adjust belt tensioner and tighten retaining bolts.
- Install the timing belt cover and its four retaining bolts.
- Connect the upper radiator hose to the engine and radiator and tighten the retaining clamps.
- Position the alternator bracket to cylinder head and install its retainers.
- If removed, position the power steering pump bracket to the engine and install its attaching bolts.
- Install the accessory drive belt and, if necessary, adjust the belt tension using Belt Tension Gauge Rotunda 021–00045 or equivalent.
- Position the intake manifold to the cylinder head, and install its retaining bolts.
- Install the rocker arm covers and retaining bolts.
- Install the spark plugs.
- Install the dipstick tube and bracket.
- Connect the appropriate vacuum hoses.
- Connect all of the upper engine components and alternator wiring harnesses.
- Position and connect the spark plug wires.
- Install the heater hose-to-valve cover retaining screws.
- Fill and bleed the cooling system.
- Install the air cleaner.
- Connect the negative battery cable.
- Start the engine and check for leaks.